design-ai-kit
English · Tiếng Việt
Teach your AI agent to design marketing visuals that clients accept — social banners, promo posts, posters, event recaps. One skill, distilled from real client revision rounds.
What it gives the agent:
- A workflow (
skills/design-ai/SKILL.md) — brief → brand research → agree a direction → assets → scripted build → self-check → deliver → feed the kit. Asks for a reference early, proposes 2–3 directions when the brief is vague, verifies offers/dates, never exports before approval, and after approval proposes what the job should add to the kit (new example, rule, gotcha). - Design principles (
references/principles.md) — rules learned from rejected drafts: match the brand’s own style, fresh over dark, one light source, offer is the hero, no empty zones, logos printed into product photos. - Re-runnable builds — JSON config → VectorCraft document, headless; every revision is a config edit +
re-run.
scripts/build_template.py(flat layout with a colour wave) andscripts/scene_template.py(one full-bleed photo + lettering, clipped to the artboard). Starting configs inskills/design-ai/examples/. - Image tools —
scripts/image_tools.py: alpha bbox, edge feathering, lighting harmonisation, contact sheets, empty-space score per grid cell, text width. - AI asset recipes (
references/ai-assets.md) — stock first; AI to print a logo onto a product, generate particles, fix one thing in a scene. Tested with the Magnific MCP; any reference-capable image model works. - Fonts and lettering (
references/fonts.md,scripts/lettering.py) — a Vietnamese-checked font shortlist, a sheet-first way to pick the title font, and title effects the engine can’t draw (3D sign, brush ink, arch).
How you and the AI work together
A job goes through 9 steps; you only decide at the ⭐ steps, the AI does the rest.
| # | Step | You | AI |
|---|---|---|---|
| 1 | Brief ⭐ | Brand, purpose, format, copy; send logo, photos, a reference | Asks for what’s missing, marks anything it had to guess as placeholder |
| 2 | Brand research | — | Finds the logo, official posters and lettering; checks the facts are current |
| 3 | Agree a direction ⭐ | Pick 1 of 2–3 directions | One line per direction, with the AI credits it would cost |
| 4 | Title font ⭐ | Pick a number on the sheet | 6–8 numbered fonts, real copy on the real background; effects on a separate sheet |
| 5 | Assets | Approve if it costs credits | Brand files › stock › AI; quotes credits before each paid call |
| 6 | Build and self-check | — | Scripted build; checks contrast, Vietnamese marks, empty zones, image seams |
| 7 | Feedback ⭐ | Say what’s off, as specifically as you can | Restates what it will change; the same defect rejected twice → a different approach, not another patch |
| 8 | Export ⭐ | Say “approved, export” | Exports only on approval: print PDF and 300 dpi PNG/JPG, keeps a snapshot |
| 9 | Feed the kit ⭐ | Approve which lessons go in, then the commit/push | Proposes lessons (brand names stripped), re-runs the examples, shows the diff |
Always: no export, commit or push without your go; no real brands, real people or copyrighted artwork in a public repo without permission; every paid AI call is quoted first.
To go faster: send a reference at the start; give feedback by circling or cropping the image rather than in words alone; pick by number from a sheet (“number 15”).
Examples
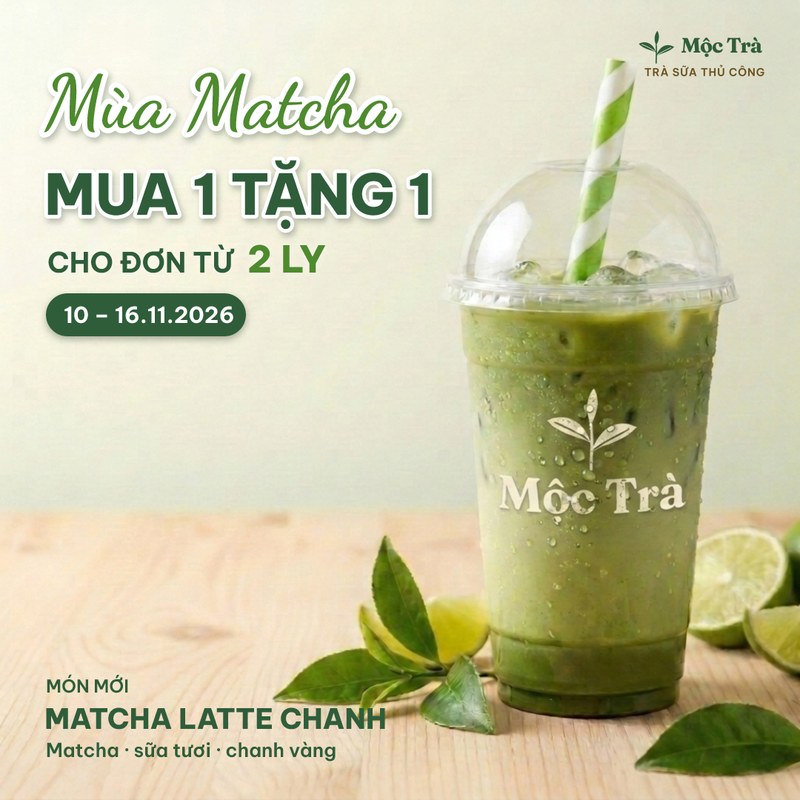
A promo post built with scene_template.py (fictional brand, AI-generated scene, logo printed into the cup):
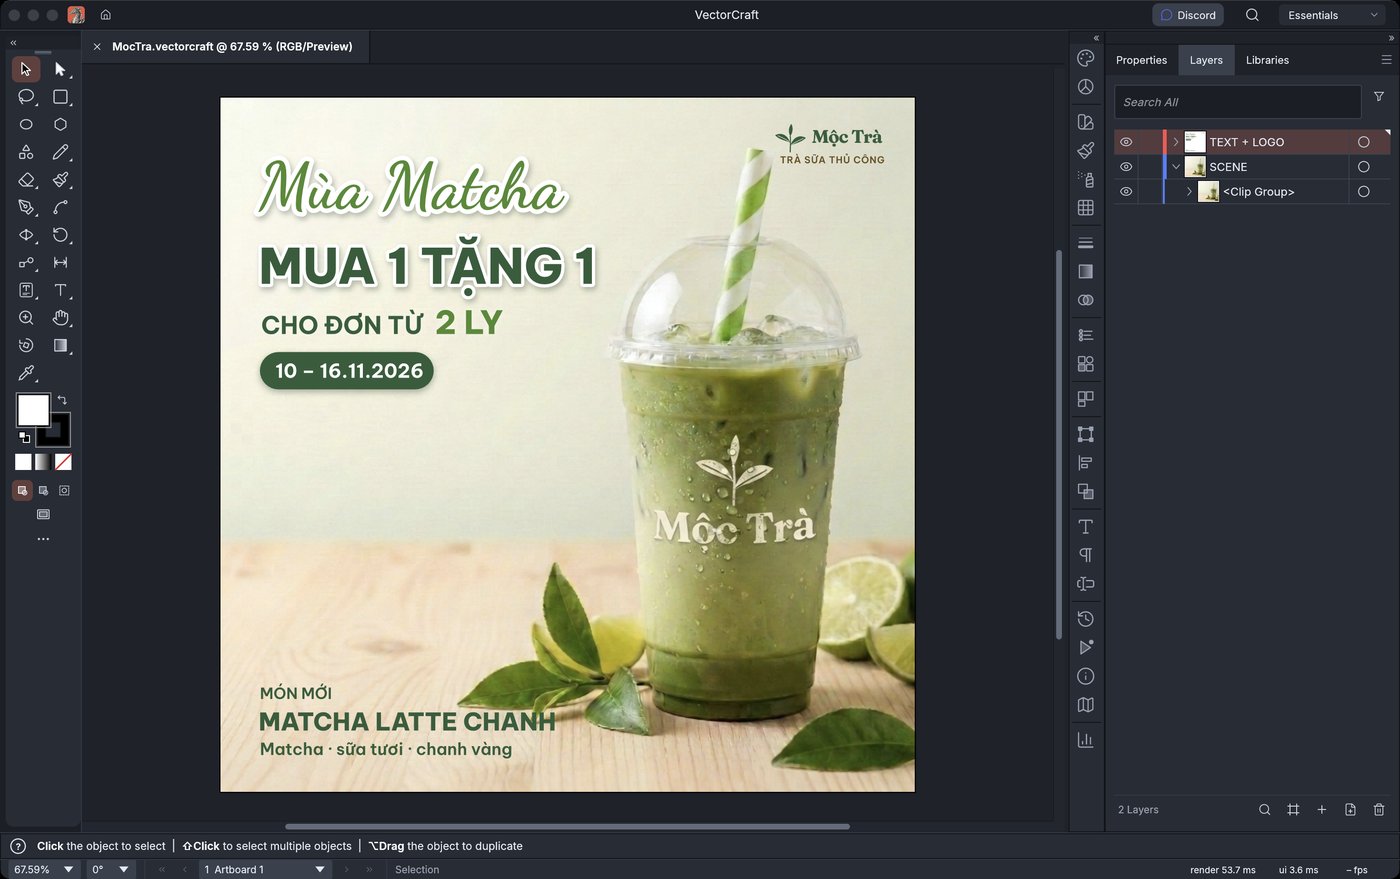
The same build open in VectorCraft — the script writes a clean layer tree (SCENE clipped to the artboard, TEXT + LOGO on top), so a designer can take over by hand:
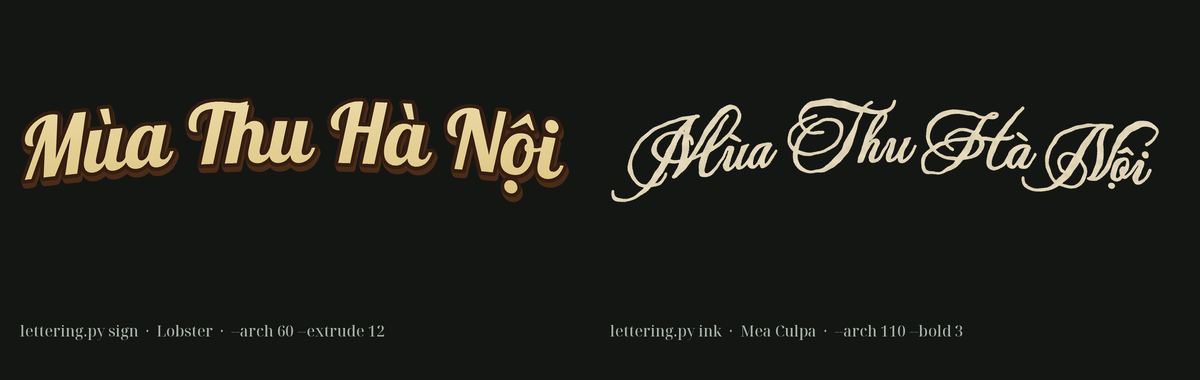
Title effects from lettering.py — sign (gradient fill, outline, 3D extrusion) and ink (hand-drawn brush pen),
both arched:
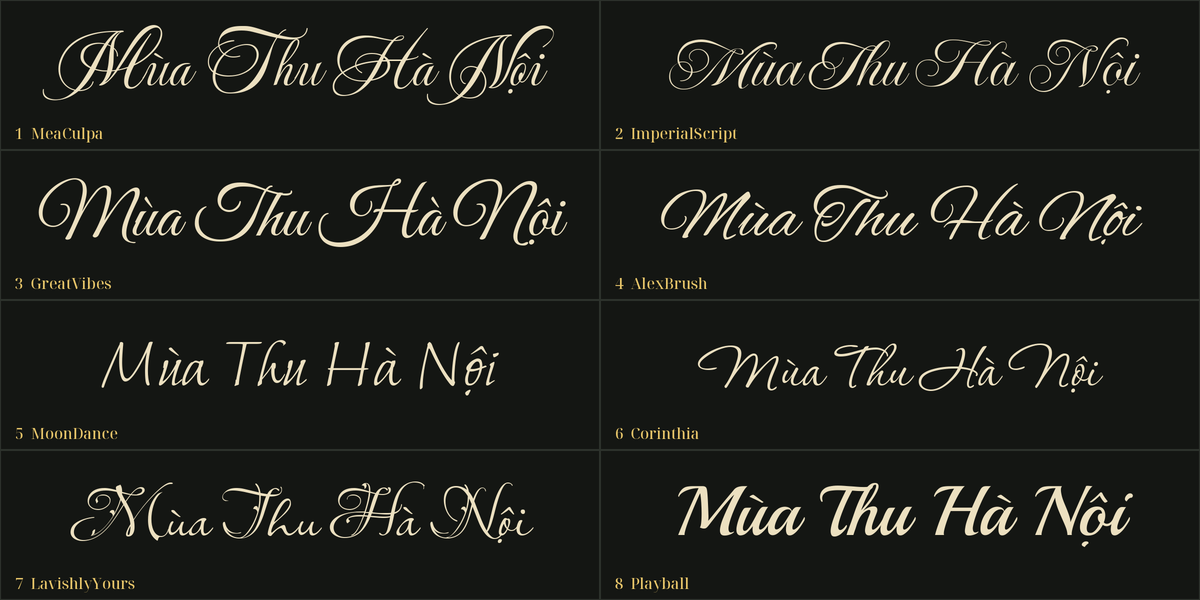
A font sheet as the client sees it: eight scripts with full Vietnamese, numbered, same copy — pick one in one round:
Install
git clone https://github.com/sparklabx/design-ai-kit
mkdir -p ~/.claude/skills && cp -r design-ai-kit/skills/design-ai ~/.claude/skills/          # Claude Code
mkdir -p ~/.gemini/config/skills && cp -r design-ai-kit/skills/design-ai ~/.gemini/config/skills/   # Antigravity
Other agents: point them at skills/design-ai/SKILL.md.
Requirements: Python 3.9+ (the skill installs Pillow/numpy into ~/.cache/design-ai/venv if missing), plus one engine — Illustrator › VectorCraft (vectorcraft-cli)
› Photoshop, picked in that order. The Adobe path (scripts/steps_to_svg.py + scripts/adobe.py, macOS) is
untested in the apps; see references/adobe.md. Optional: an image-generation MCP, or the Antigravity CLI agy
(scripts/agy_image.py uses its built-in image tool on your Google plan).
Try it
cd skills/design-ai
cp examples/promo-square.json my.json   # or examples/scene-square.json with scripts/scene_template.py
# edit my.json: asset paths, copy, palette, positions
python3 -E scripts/build_template.py my.json steps.json out.vectorcraft
vectorcraft-cli run --commands steps.json --export preview.png
License
MIT. Brand names in the docs are examples only; no third-party logos or product images are included.
Source: README.md on GitHub ↗